Batch Jobs
Batch jobs is a feature to accommodate demands on non-emergency tasks with lower cost. Users can upload their tasks on a waiting queue managed by our platform, and we will run the task when the computing resources are available. Users can pay less than on-demand cost but get all computing resources runned at their need.
We will go through a sample task to illustrate this new feature. Hope it makes sense!
Prerequsite
Before using this feature, you need to set up your environment for the task. We recommend two ways to set up this environment:
-
Using a Customized Image:
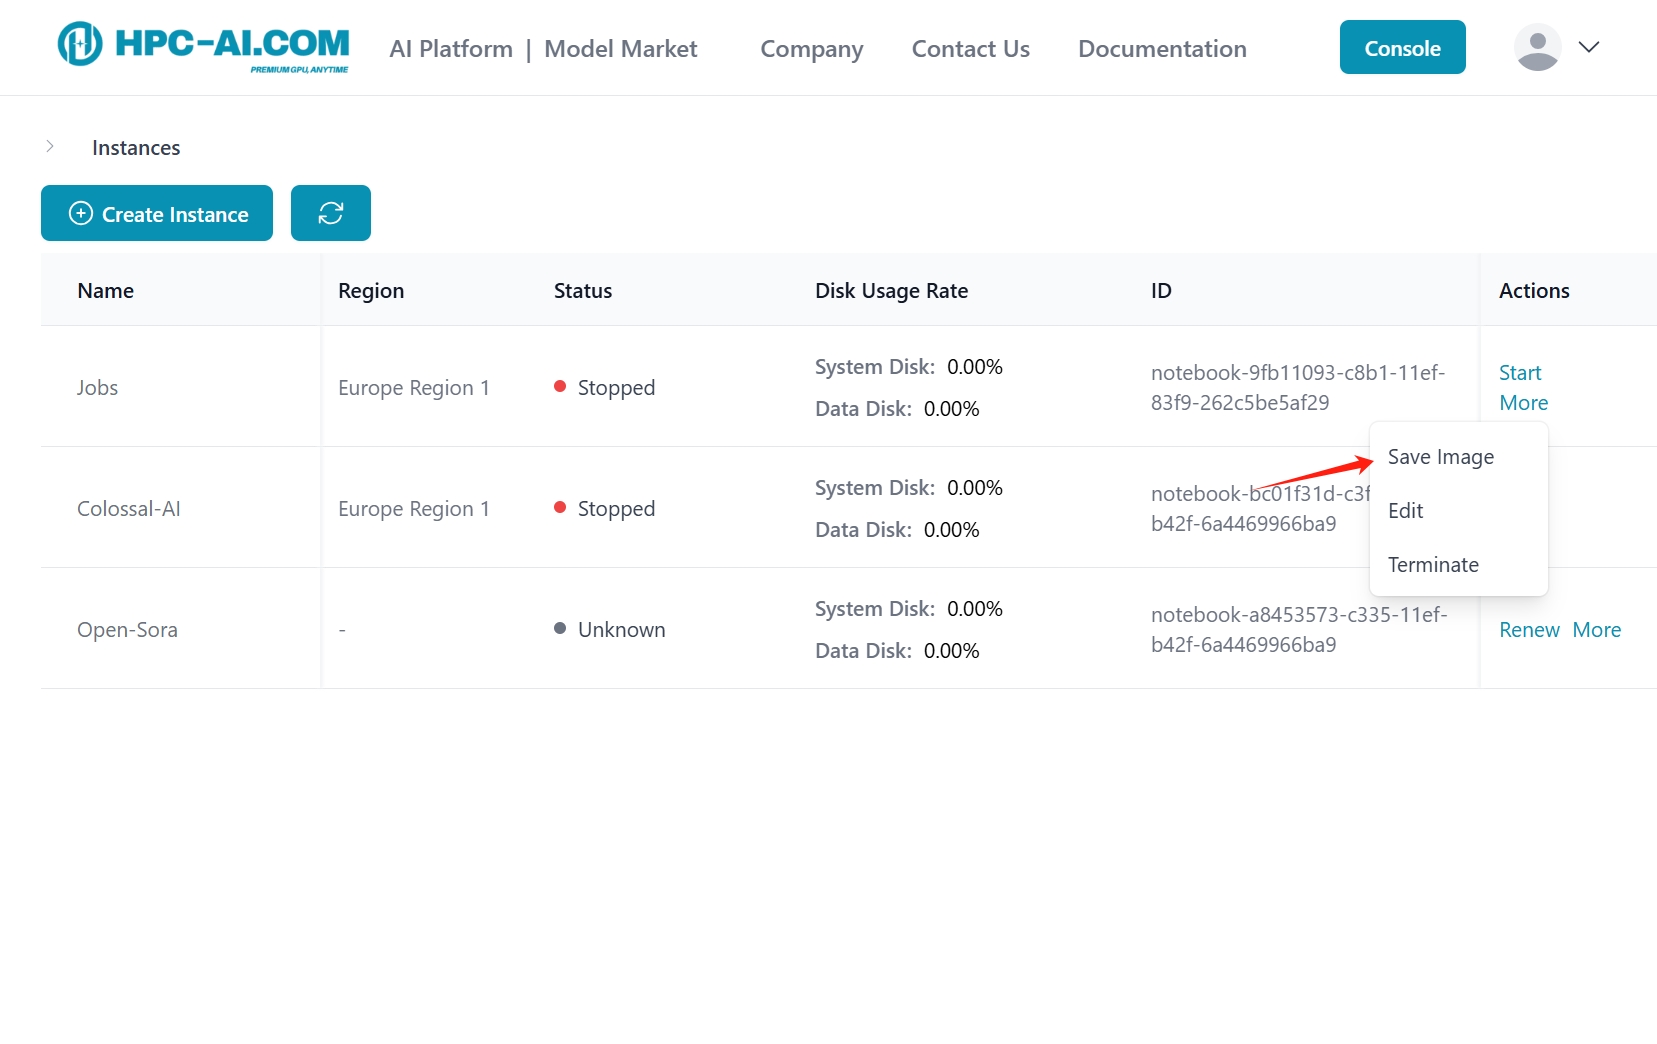
- Start an instance and install all the necessary packages.
- To save the instance as an image, navigate to the Actions column of your selected instance and click More → Save Image.
- Input an image name and description to save the image.
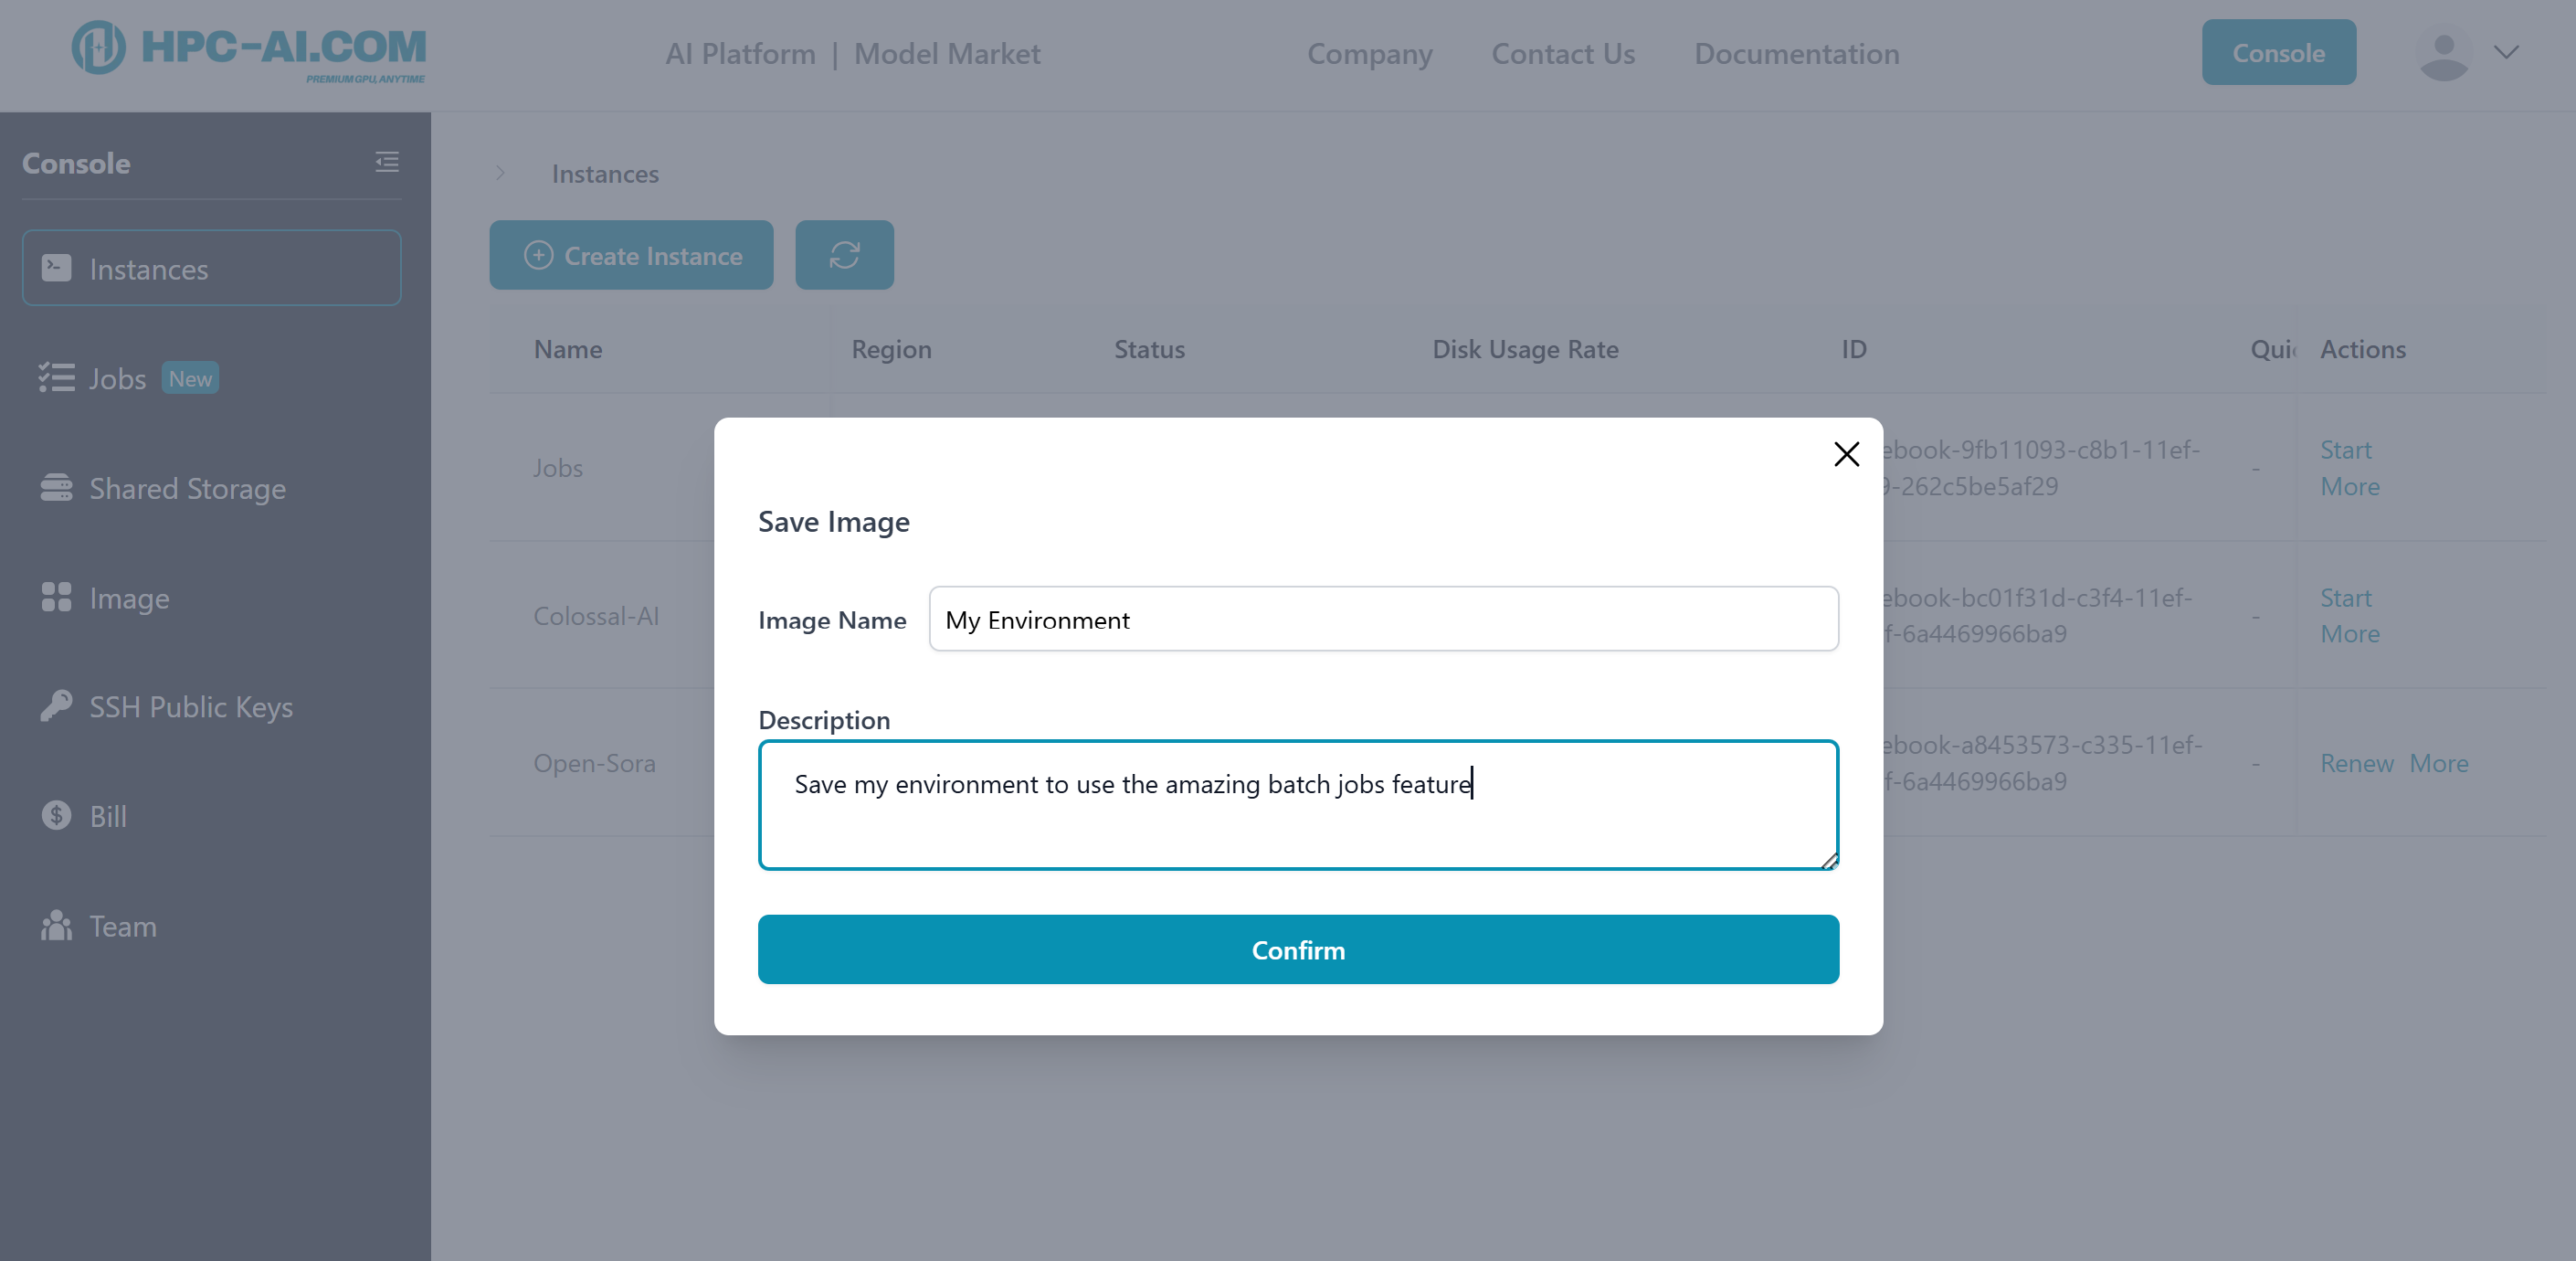
- When you start the job, you can use your customized image.
-
Using Manual Launch Commands:
- You can manually input launch commands to install the required libraries and packages before executing your actual job command.
Sample Setting
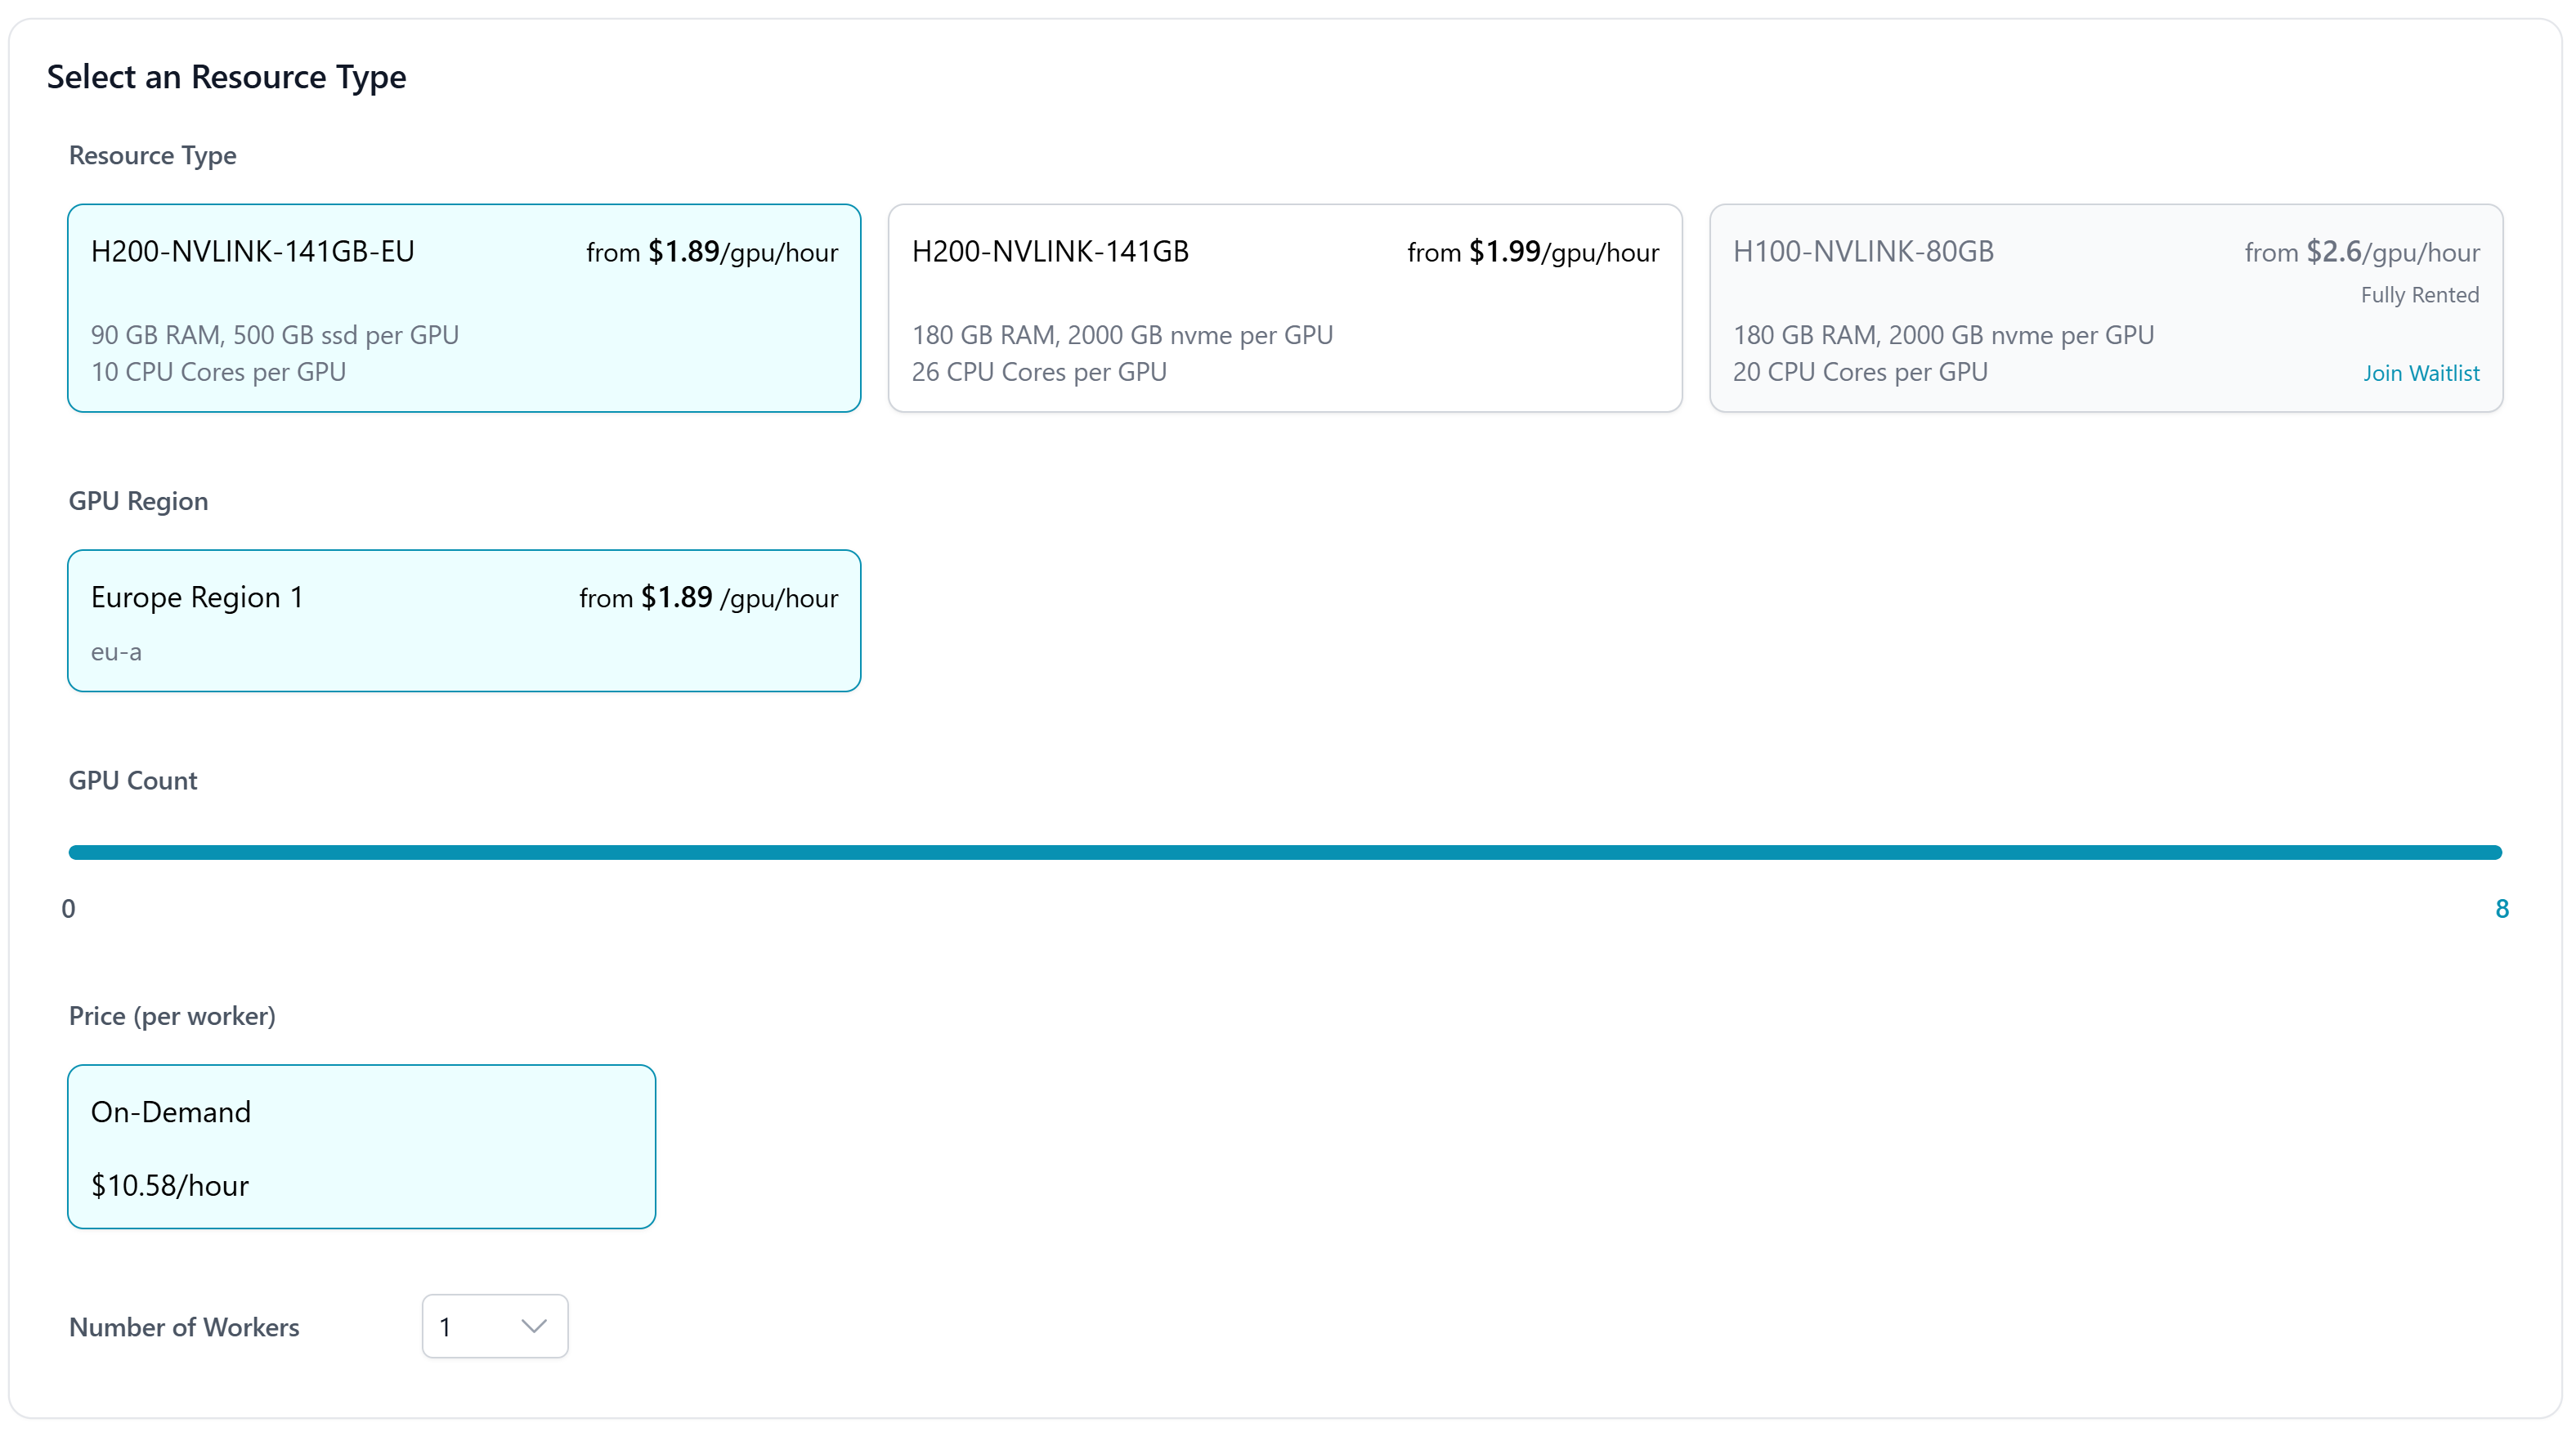
Machine: An 8 GPU node. We would utilize PyTorchJob with one 8-GPU worker.
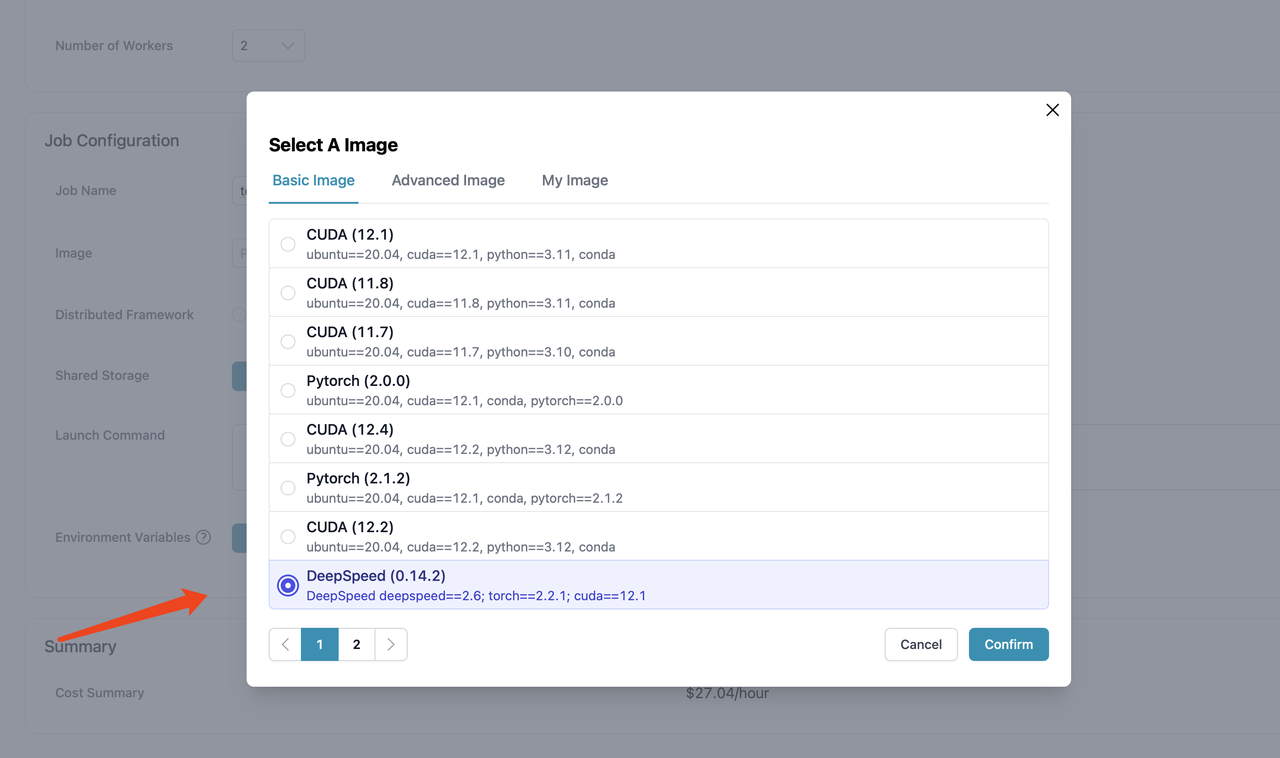
Image: Use DeepSpeed (0.14.2) Image in the Basic Image section.
Sample Task
The mnist-distributed is used to train and test the performance of a simple CNN model on the FashionMNIST public dataset. We use this model to give an brief illustration on how this batch jobs feature works. The code we use is provided here.
We offer different types of storage (filesystem & highspeed) for storing code and datasets, taking filesystem as an example:

Users can create an instance to modify different types of storage, and this directory has been pre-configured with the aforementioned code file mnist.py.
Overall Process of Batch Jobs
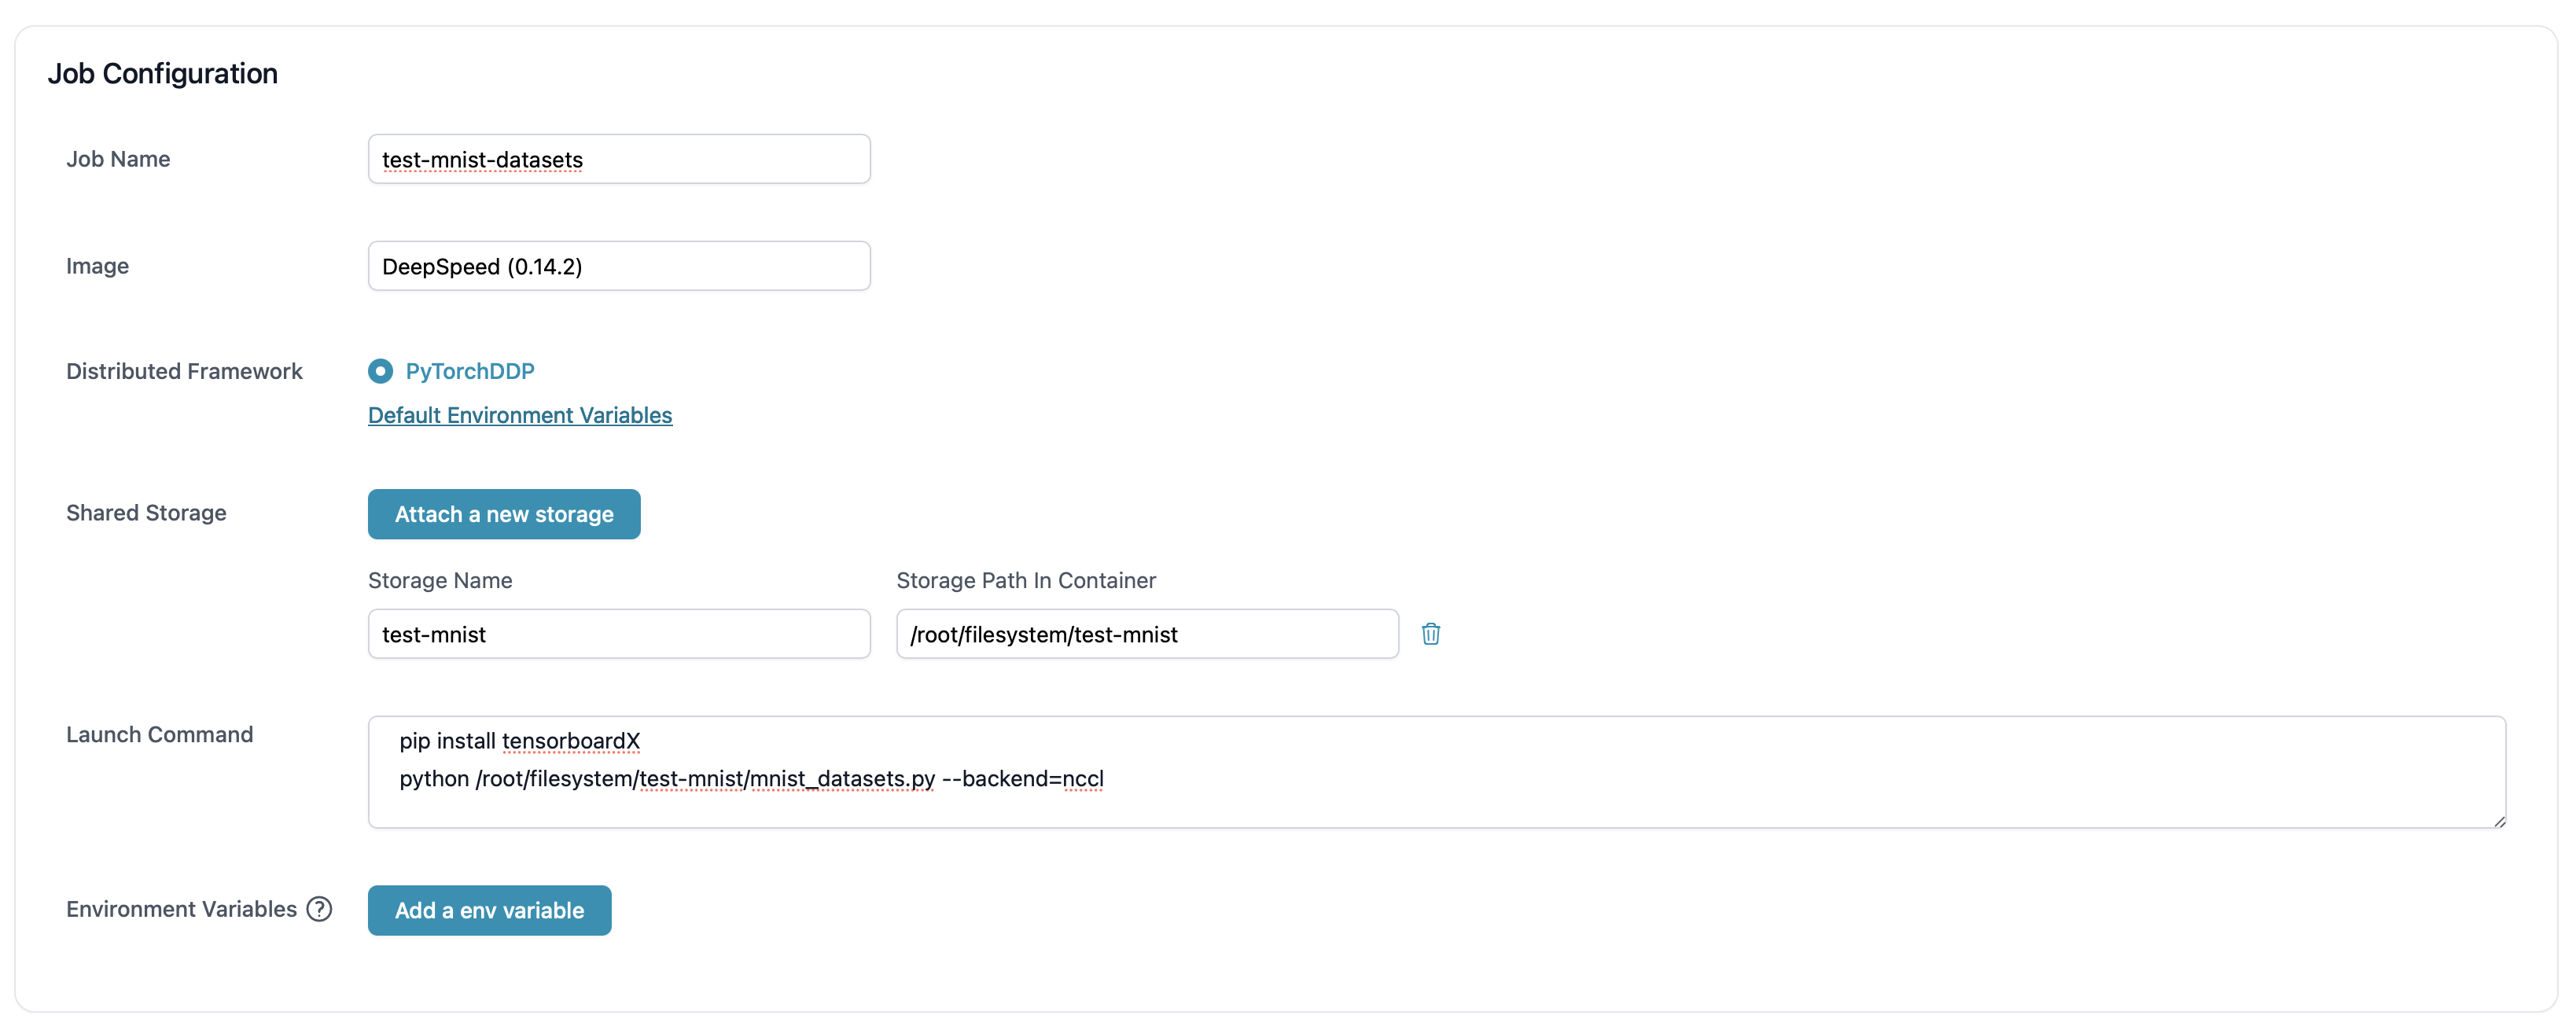
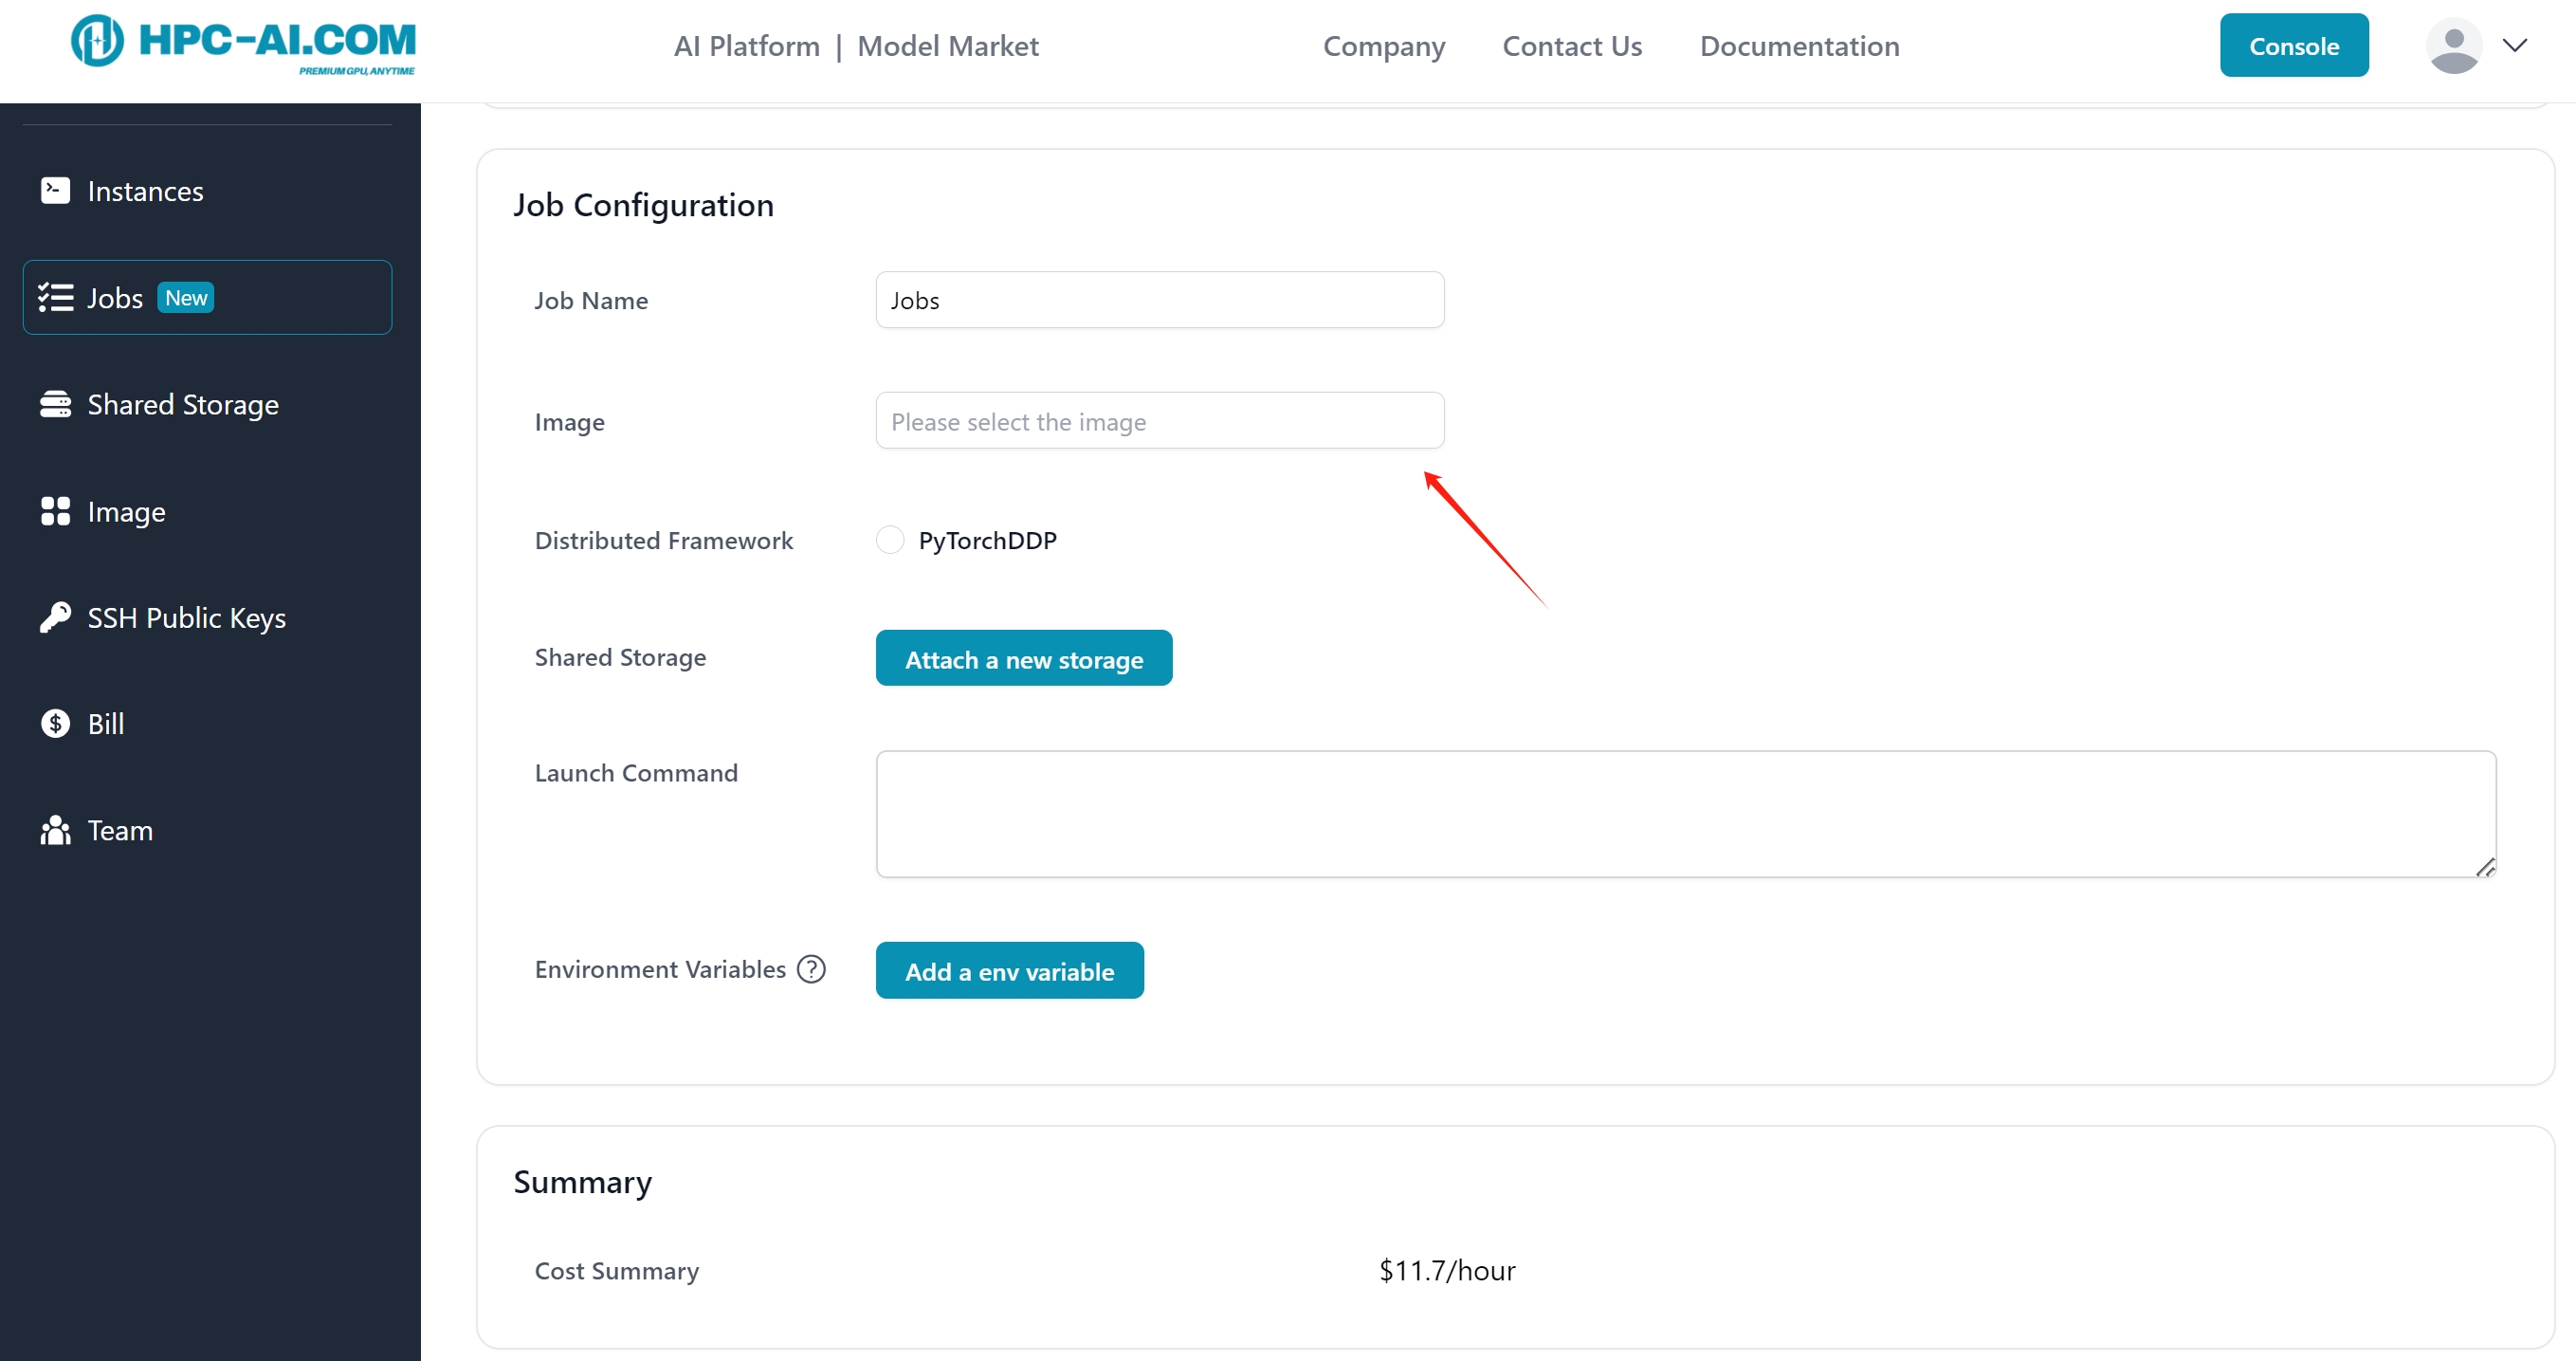
- Choose the appropriate machine configuration
- Add job information. Currently, we use DeepSpeed image. We will be also supporting Colossal-AI distributed training engine in the near future.
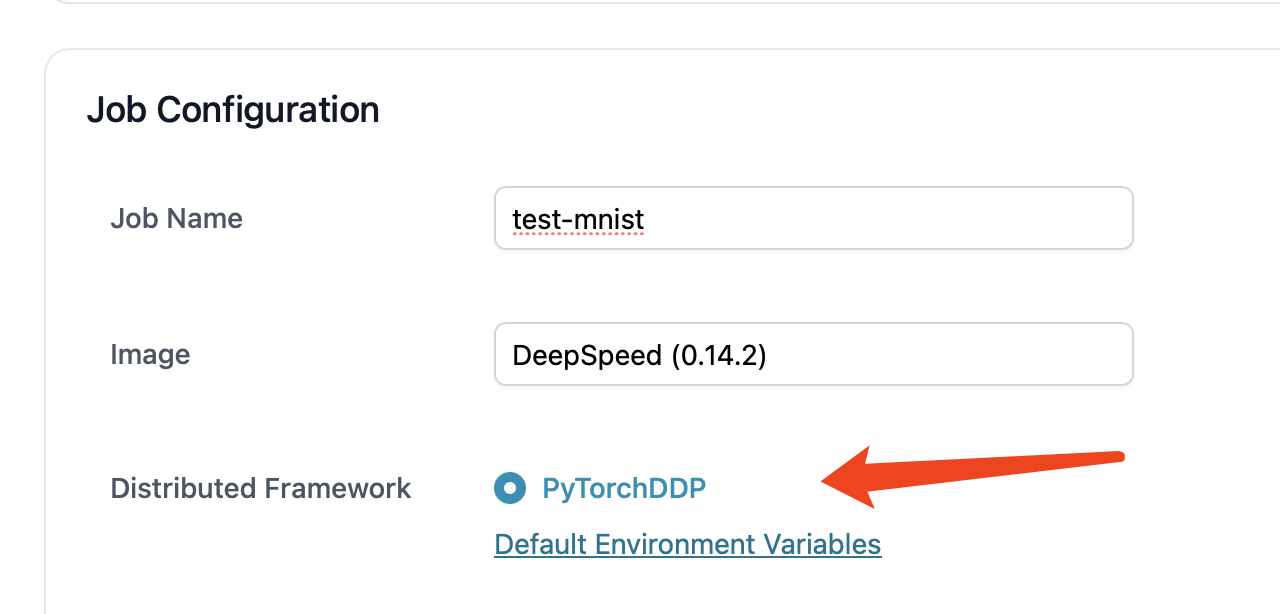
- We use
PyTorchDDPframework.
- Mount the shared storage and then input launch command.
pip install tensorboardX
python /root/highspeedstorage/test-mnist-highspeed/mnist.py --backend=nccl

- After creation, the task will be running when resources are available.

Customized Dataset
The process mentioned above uses the FashionMNIST public dataset. Users can also configure their own datasets to shared storage. We enter the instance and modify the dataset directory in the code to the actual mounted directory.
train_loader = torch.utils.data.DataLoader(
        datasets.FashionMNIST('/root/filesystem/test-mnist/data/fashion', train=True, download=False,
                       transform=transforms.Compose([
                           transforms.ToTensor(),
                           transforms.Normalize((0.1307,), (0.3081,))
                       ])),
        batch_size=args.batch_size, shuffle=True, **kwargs)
    test_loader = torch.utils.data.DataLoader(
        datasets.FashionMNIST('/root/filesystem/test-mnist/data/fashion', train=False, transform=transforms.Compose([
                           transforms.ToTensor(),
                           transforms.Normalize((0.1307,), (0.3081,))
                       ])),
        batch_size=args.test_batch_size, shuffle=False, **kwargs)
Place the actual dataset in shared storage, where the public dataset is downloaded in advance.
cd /root/filesystem/test-mnist

// git clone https://github.com/zalandoresearch/fashion-mnist.git
wget http://fashion-mnist.s3-website.eu-central-1.amazonaws.com/train-images-idx3-ubyte.gz
wget http://fashion-mnist.s3-website.eu-central-1.amazonaws.com/train-labels-idx1-ubyte.gz
wget http://fashion-mnist.s3-website.eu-central-1.amazonaws.com/t10k-images-idx3-ubyte.gz
wget http://fashion-mnist.s3-website.eu-central-1.amazonaws.com/t10k-labels-idx1-ubyte.gz

gunzip train-images-idx3-ubyte.gz
gunzip train-labels-idx1-ubyte.gz
gunzip t10k-images-idx3-ubyte.gz
gunzip t10k-labels-idx1-ubyte.gz

cp -r ~/filesystem/test-mnist/fashion-mnist/data/fashion/ ~/filesystem/test-mnist/data
Here is the new configuration.