Local Data Transfer
You can transfer data between your local machine and cloud instance using:
- Jupyter Notebook UI: For uploading/downloading files.
scpCommand: For secure file and directory transfers.- Visualization Tools: Such as FileZilla or XShell for graphical transfers.
Use Jupyter Notebook to Transfer Data
You can use the Jupyter Notebook UI to transfer data between your local machine and the cloud. However, note that folder uploads and downloads are not supported—only individual files can be transferred.
Accessing Jupyter Notebook
-
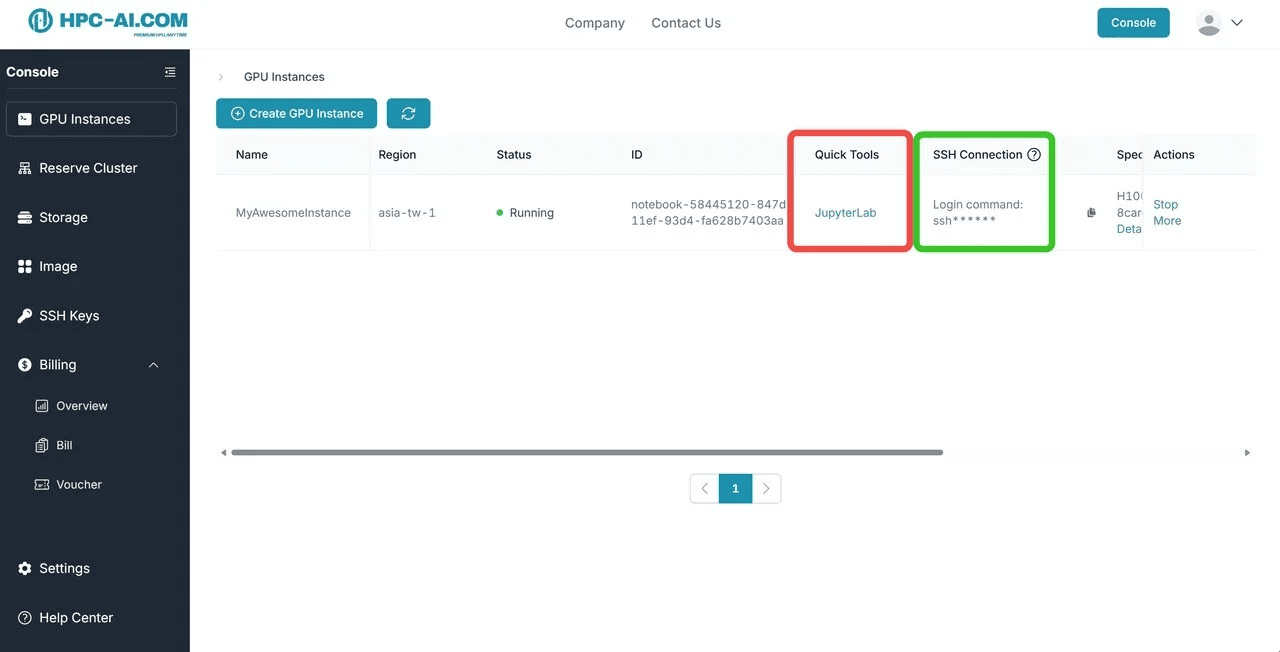
Navigate to the Console and select the Instance section on the left-hand side.
-
Click the JupyterLab button to access your instance through the web interface.
Upload Data
To upload a file from your local machine to the cloud via Jupyter Notebook:
-
Click the Upload button on the right side of the Jupyter Notebook UI.
-
Select the file you wish to upload from your local machine.

Download Data
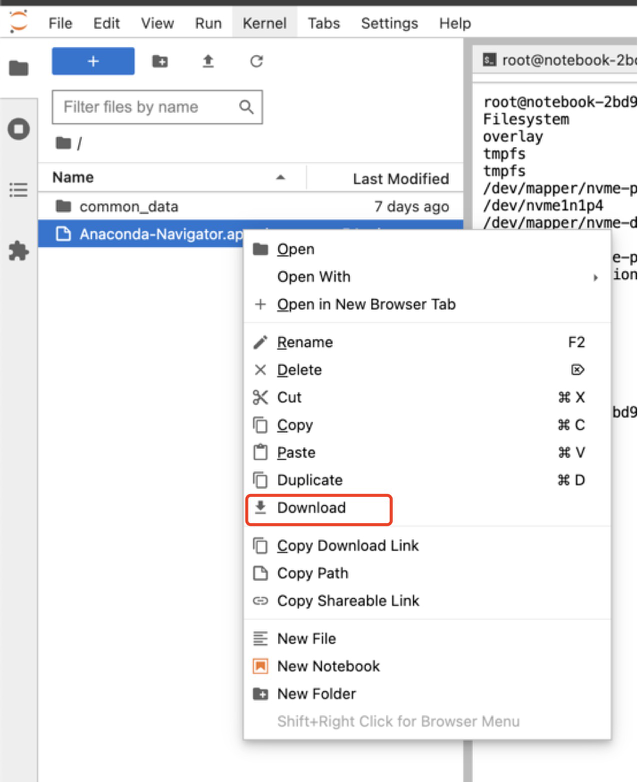
To download a file from the cloud to your local machine via Jupyter Notebook:
-
Select the file you want to download.
-
Click the Download button on the right side of the Jupyter Notebook UI.
Transferring Data with SCP
Note:
scp commands should be executed on your local machine to upload data to or download data from the cloud.
The general syntax for transferring data using scp is as follows:
scp -P <cloud_port> </path/to/local/file> root@<cloud_ip>:<destination_path>
Replace <cloud_port> and <cloud_ip> with the port and IP address of your cloud instance. In the following examples, they are 32889 and 211.102.192.100, respectively.
Example: Uploading a File to the Cloud
To transfer a file from your local machine to the cloud:
scp -P 32889 ~/local/example.txt root@211.102.192.100:/root/example.txt
Example: Downloading a File from the Cloud
To retrieve a file from the cloud to your local machine:
scp -P 32889 root@211.102.192.100:/root/example.txt ~/local/example.txt
Example: Transferring a Directory
To copy an entire directory, including its subdirectories and files, use the -r flag:
scp -r -P 32889 ~/local/example_dir root@211.102.192.100:/root/example_dir
Private Key Configuration
If your private key file is not located in the default directory (~/.ssh/id_rsa), or if you are using the Windows Command Prompt, update the file path in your SCP command to point to the correct private key file location.
-
Custom Private Key Location: If your private key file is stored in a custom location, such as
/custom/path/to/id_rsa, modify your SCP command like this:scp -i /custom/path/to/id_rsa -P 32889 ~/local/example.txt root@211.102.192.100:/root/example.txt -
Windows Command Prompt: If you're using the Windows Command Prompt, ensure the file path uses backslashes (
\) instead of forward slashes (/) and includes the full drive letter (e.g.,C:\). For example:scp -i C:\Users\YourUserName\.ssh\id_rsa -P 32889 C:\local\example.txt root@211.102.192.100:/root/example.txt
Use Visualization Tools to Transfer Data
You can use visualization tools like FileZilla or XShell to transfer data between your local machine and the cloud.